Quick Start
HS Access
Access to your HS instance is done using your favorite browser, and navigating to:
https://yourdomain.com/admin
If you need assistance with your login credentials, contact your HS administrator.
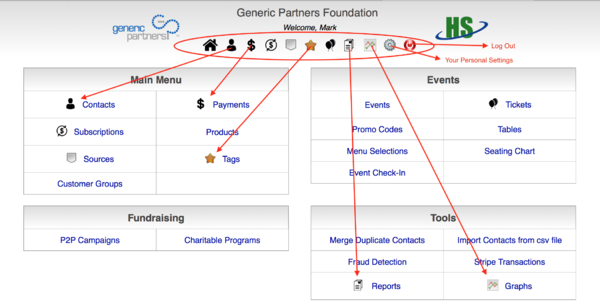
Use the navigation bar to jump quickly to a commonly used screen:
Summary Screens
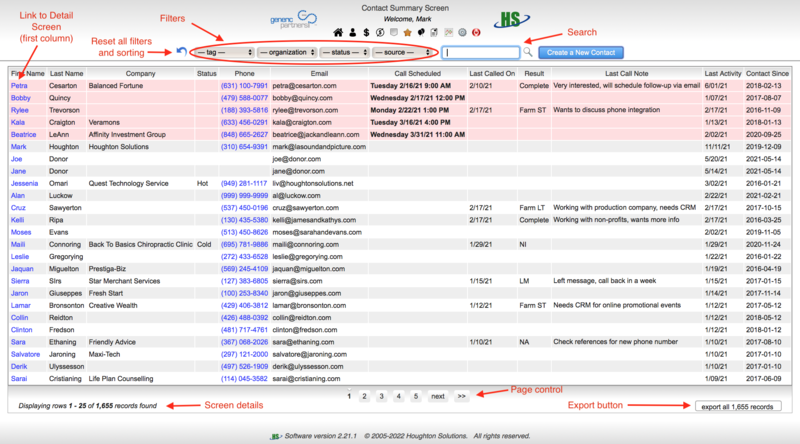
Summary Screens give you a quick view of the latest entries in your table. You can narrow down the list of records displayed using the pulldown filters. You can always drill down to any record's Detail Screen by clicking on the link in the first column. Or, use the Search Box to find an individual record.
Search Box
The Search Box searches as you type. It only searches on the table you are currently viewing, and it will match based on a variety of fields within the table.
The first matching record found is always highlighted by default.
Note: Don't hit the return key until the record you are looking for is highlighted. If no list is shown, that means no records have been found that match your search input.
Sorting
You may click on any column heading to sort the records shown by that column, by ascending value. Clicking a second time will sort by descending value. Clicking a third time will remove the sort and revert to the default sorting for that table. Use the reset button to reset all filters and sorting to their default values.
Detail Screens
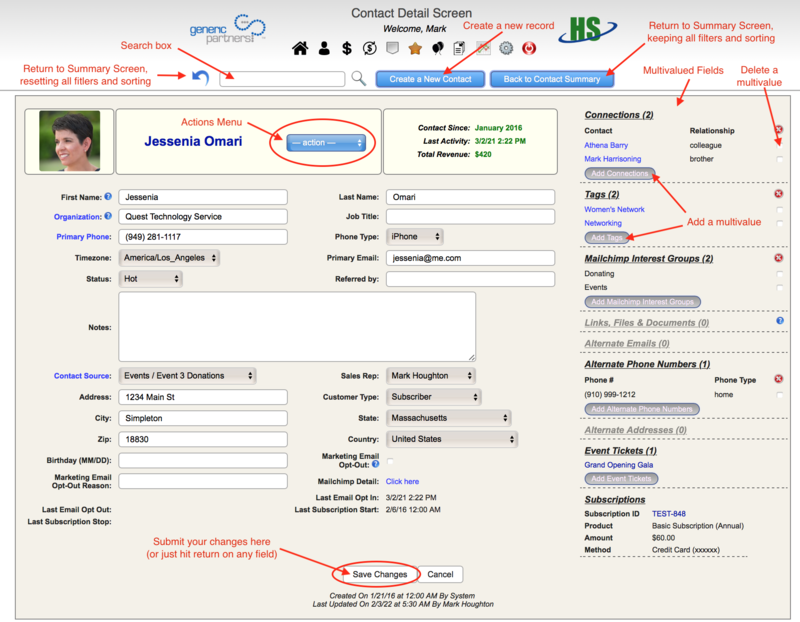
The Detail Screen allows you to view and/or edit a specific record in the table.
Field Help Text
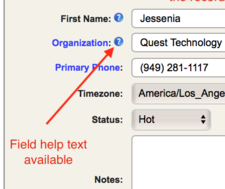
If you see a blue question mark next to a field label, there is help text available. View it by hovering over or clicking on the blue question mark.
Refresh Data
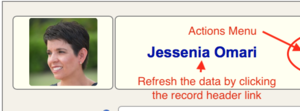
If you need to refresh your Detail Screen for any reason, simply click on the record heading link.
Note: Clicking here will abandon any changes made that have not already been saved.
Multi-valued Fields
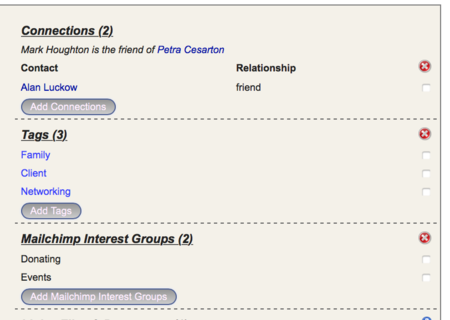
Data fields that may have multiple values are shown on the right-hand portion of the Detail Screen, if there are any. In this section you can add new values, or delete existing ones for that record.
Note: Changing these values is done by deleting the value, and then adding the correct value afterward.
To delete a value, check the delete box to the right and click Save Changes.
